May 16, 2010

Recipes from our vacations

Cook 1 - Escape to pineapple mountain
Last year at this time my bf and I were drinking champagne on a plane en route to Maui. Expanses of soft sand, sapphire toned water and laid back hippie attitudes awaited us. Flash forward one year later and we are drinking tepid coffee at the kitchen table surrounded by 3 days worth of newspapers and mail. In a sad, escapist attempt to re-live the exoticism of our trip to the tropical paradise of Hawaii, I made a pineapple upside-down cake.
One day on our vacation, we drove up to the peak of Haleakala, a dormant volcano on Maui. On our way back to the resort, we took a route through some pineapple and sugar cane fields and stopped for lunch at the Hali'imaile General Store, a restaurant about a mile down a farm access road. Since the restaurant is located on an old pineapple plantation and features local Hawaiian produce, I figured I should try the pineapple upside-down cake for dessert.


Everything about it was right on: the pineapple had a startlingly floral and piney taste that made me realize that this was my first true taste of Pineapple. The cake itself was spongy and soaked up the toasty caramel and the Lappert's vanilla ice cream. I haven't forgotten that cake and knew I had to re-create it.

I'm going to be honest. The pineapple upside-down cake I made this weekend doesn't come close to rivaling the one I tasted in Hawaii - but I didn't expect it to. My pineapple came not from a local farm, but from a grocery store. And I ate the cake indoors on my couch instead of on a wooden porch, a soft breeze carrying the sugary scent of growing pineapple through the air. Yet, the cake I made was tasty and easy to make, and it did its Proustian job well: it brought back memories of my trip and of how relaxed we felt that day as we polished off our leisurely lunch in a paradise that is only a short 10 hour plane trip away.


Pineapple Upside-down Cake, adapted from Gourmet by smittenkitchen.com

Topping:
1/2 medium pineapple, peeled, quartered lengthwise, and cored
3/4 stick unsalted butter
3/4 cup packed light brown sugar

Batter:
1 1/2 cups all-purpose flour
2 teaspoons baking powder
1/4 teaspoon salt
3/4 stick unsalted butter, softened
1 cup granulated sugar
2 large eggs
1 teaspoon vanilla
1 tablespoon dark rum
1/2 cup unsweetened pineapple juice
2 tablespoons dark rum for sprinkling over cake

Special equipment: A well-seasoned 10-inch cast-iron skillet. If you lack a cast-iron skillet of this size, make the caramel in a small pot and scrape it into the bottom of a similarly-sized cake pan. 
Preheat oven to 350°F.
Make topping: Cut pineapple crosswise into 3/8-inch-thick pieces. Melt butter in skillet. Add brown sugar and simmer over moderate heat, stirring, four minutes. Remove from heat. Arrange pineapple on top of sugar mixture in concentric circles, overlapping pieces slightly.
Make batter: Sift together flour, baking powder, and salt. Beat butter in a large bowl with an electric mixer until light and fluffy, then gradually beat in granulated sugar. Add eggs, one at a time, beating well after each addition. Beat in vanilla and rum. Add half of flour mixture and beat on low speed just until blended. Beat in pineapple juice, then add remaining flour mixture, beating just until blended.
Spoon batter over pineapple topping and spread evenly. Bake cake in middle of oven until golden and a tester comes out clean, about 45 minutes. Let cake stand in skillet five minutes. Now be brave. Using potholders or kitchen towels to safeguard your hands, invert a plate over the skillet and invert cake onto plate (keeping plate and skillet firmly pressed together). Replace any pineapple stuck to bottom of skillet. Sprinkle rum over cake and cool on plate on a rack.
Serve cake just warm or at room temperature with whipped cream or vanilla ice cream and a sprig of mint if you so desire.
Do ahead: Cake may be made one day ahead and chilled, covered. Bring to room temperature before serving.

February 24, 2010

Quick & Easy Meals

Cook 1:
The end of February and its drudgery are upon us. Constant snow storms force the same dull costume of waterproof boots and battered coats, some fringed with once regal, but now wilted, fur hoods. Knowing that we've got at least a month of work to get through before the reprieve of a federal holiday is just...demoralizing. And let's not even get into the looming threat of taxes...But one thing that shouldn't push you further into the doldrums is the thought of preparing a healthy dinner every night. By the time you get home from work, drag yourself to the gym, and throw a load of laundry in, it probably seems easiest to just order in a pizza or a generic deli salad. Don't! Well, OK, once in a while is fine, but give these easy every-day recipes a try first and see if they don't bring some zest and excitement to these relentlessly ordinary days of winter.


Broccoli and Shrimp (Adapted from a NYTimes recipe) - serves 3-4

Growing up, my parents force fed me broccoli nearly every night. I hated it and have only recently given it another try. It turns out that broccoli is quite good when it's not steamed to oblivion.  The toasty spices and the kick of the chili powder give the roasted broccoli depth, and the lemon brightens and pulls the whole dish together. Feel free to use less shrimp if you want more vegetables than fish.

2 pounds broccoli, cut into bite-size florets
4 tablespoons ( 1/4 cup) extra virgin olive oil
1 teaspoon whole coriander seeds
1 teaspoon whole cumin seeds
1 1/2 teaspoons kosher salt
1 teaspoon freshly ground black pepper
1/8 teaspoon hot chili powder
1 pound large shrimp, shelled and deveined (I buy frozen bagged shrimp and keep the bag in my freezer, defrosting small quantities of shrimp as I need them. To defrost, just throw the shrimp in a colander and place under running cold water for five minutes.)
1 1/4 teaspoons lemon zest (from 1 large lemon)
Lemon wedges, for serving.

1. Preheat oven to 425 degrees. In a large bowl, toss broccoli with 2 tablespoons oil, coriander, cumin, 1 teaspoon salt, 1/2 teaspoon pepper and chili powder. In a separate bowl, combine shrimp, remaining 2 tablespoons oil, lemon zest, remaining 1/2 teaspoon salt and remaining 1/2 teaspoon pepper.

2. Spread broccoli in a single layer on a baking sheet. Roast for 10 minutes. Add shrimp to baking sheet and toss with broccoli. Roast, tossing once halfway through, until shrimp are just opaque and broccoli is tender and golden around edges, about 10 minutes more. Serve with lemon wedges, or squeeze lemon juice all over shrimp and broccoli just before serving.

Vietnamese Style Sandwich (inspired by Dorie Greenspan's recipe) - serves 2

2 chicken breasts, skin-on, bone-in OR a Rotisserie chicken from the grocery store
1 baguette
Garnishes:
2 tablespoons Thai sweet chili sauce
1/2 English cucumber (or 1 regular cucumber), seeded and sliced into matchsticks or spears
4 carrots, peeled into thin strips
1/3 cup rice vinegar, white vinegar, apple cider vinegar (any of these are OK) (optional)
1 teaspoon sugar (optional)
3 teaspoons salt (optional)
a bunch of cilantro
Special Sauce:
1 teaspoon Sriracha sauce or more to taste
4 tablespoons mayonnaise (Hellman's is great for this. No Miracle Whip)
1 teaspoon fish sauce (optional, found in Asian section of grocery store)
1 teaspoon vinegar or freshly squeezed lemon juice (optional)
1/2 teaspoon sesame oil (optional)

This recipe is great because you can customize it to suit how much time you feel like spending on its preparation. It has crunchy vegetables, lean protein, spice and sweetness, only a little heart clogging  but delicious fat, and crusty white bread - a study in pleasing textures and flavors. It's really a wannabe banh mi sandwich - but it's got bold, pan-Asian flavors and it's just plain fun to eat.

1. If you are roasting your own chicken, drizzle a little olive oil on the two bone-in breasts, salt and pepper them, put them on a baking sheet and throw them in a 375 degree oven for about 20-30 minutes or until cooked through (clear juices, no blood when you cut near the bone). To speed this process up, let the chicken come to room temperature before cooking. If you are using a store-bought rotisserie chicken, remove the plastic cover, cut the two breasts off and save the rest of the chicken for another use (tomorrow's dinner, see below recipe).

2. If you bought your chicken, store it in the fridge while you prepare the garnishes. If you are cooking your chicken, get your prep ingredients ready while it cooks. First make the special sauce. If you don't have the optional ingredients (fish sauce, vinegar/lemon, sesame oil), then just mix the mayo and Sriracha together in a little bowl and set aside. Otherwise, combine all the ingredients and set aside.

3. Now get the veggies ready. If you are in a rush, then just cut the cucumbers up into matchsticks and use a vegetable peeler to make long thin strips out of the carrots. If you have the inclination to flash pickle the veggies, then dump the 1/3 cup vinegar, the salt and the sugar into a bowl big enough to fit the veggies, stir it up, and throw the cucumbers and carrots in. They will pickle within minutes and if you leave them overnight, they will get nice and soft and you can use them for the soba salad (recipe below) for your dinner the following night.

4. Get your bread ready. Depending on your hunger level, cut a portion of the baguette for you and your dinner companion. We usually eat about a third each of the baguette, but feel free to use more or less. Slice each portion of bread in half to form a pocket - don't cut all the way through.

5. Your roasting chicken should be ready by now. Pull it out of the oven, let it rest for 5 minutes until it's cool enough to rip off the skin. If you bought your chicken, likewise, pull off the skin and discard. Aren't we so healthy, with our virtuous disposal of chicken fat? Well, we're about to replace that skin with mayo, so don't get too high on your horse.

6. Cut the chicken off the bone so it's in bite size pieces or savagely shred it with your fingers, depending on your mood. Now get that mayo out and spread some on both sides of the bread - the amount you use is up to you. Place some chicken on the bread and layer some of the veggies on top. You may find that you can't use a whole breast on each sandwich, which is fine - just save the chicken for another use. If you like cilantro, throw some cilantro on top of the chicken. Now for the final touch: squeeze some chili sauce over everything (remember, it's sweet, not spicy). That's it!

7. Place each sandwich (which will barely close) on a big plate and serve with a ton of napkins. You can adjust the seasonings as you eat and decide if your tastes call for more spice from the mayo, more crunch from the veggies, or more sweetness from the chili sauce.

Soba Salad - 2 servings

This quick and easy salad will use up your leftovers from the banh mi wannabe sandwich above. It's light, fast, and delicious. Soba noodles are very nutritious and have a pleasantly nutty flavor. I wouldn't recommend swapping them out for any other type of noodle in this case.

1-2 packets soba noodles, or more depending on your appetite
1 scallion
6 or more cups of arugula or lettuce of choice
Optional: reserved chicken breast from above recipe, pickled vegetables

Dressing:
1/4 cup rice vinegar
1 teaspoon soy sauce
1 tablespoon orange juice
1 tablespoon sesame oil
1 teaspoon minced ginger (optional)

1. Boil a medium saucepan of water. Cook soba noodles according to directions on package, about 6 minutes. Drain noodles, rinse, drizzle with a little sesame oil and sprinkle with salt and set aside.

2. Mix dressing ingredients together.

3. On a large plate, layer lettuce, soba noodles and pickled vegetables and chicken, if using. Lightly dress with the dressing. Scatter with scallions and serve. You will most likely have dressing leftover - it will keep for about a week in the fridge.


Cook 2

This meal has been one of my favorite go-tos pretty much since I've been working.  Its cheap, quick, easy, and only involves 1 ingredient that isn't a pantry staple.  The trick is to use chicken broth, spices and dried fruit to spice up the couscous, and a really hot cast iron pan for the mushrooms.  In the time it takes to boil 1 cup of broth, pour it over the cousous and wait 5 minutes you're done with the portobellos and ready to eat!

Portobellos & Couscous
(recipe is for 2)

2 large portobello mushroom caps, stems removed, rinsed and patted dry with a paper towel
1 cup couscous (I always buy the large container of it instead of the small boxes so that I have some on hand)
1 cup chicken broth (or water)
dried fruit, roughly chopped (apricots are my favorite)
pinch of cumin
pinch of corriander
pinch of thyme
salt and pepper

1. Heat cast iron pan over med-high heat.
2. While pan is heating bring chicken broth, spices, salt and pepper to boil in small pot.  If your dried fruit is really dry throw the pieces in the broth and they'll absorb the delicious flavors.  The apricots I used this time were already really juicy so I just waited and threw them in the couscous at the end.
3. Once it's boiling pour broth over couscous in a large bowl, cover with plastic wrap and let sit for 5 minutes.
4. While couscous is sitting pour a little olive oil on both sides of the portobellos and place them gill side up on the cast iron pan.  They will smoke and sizzle.  Check them regularly and when they are brown (but not burned) flip them over.  Use your spatula to press them down gently (and usually they will flatten out on their own as well).  When they are ready to flip again salt and pepper both sides.  Continue cooking until tender all the way through and beginning to release some juice.
5.  Fluff couscous with a fork.  Serve immediately, laying portobello on top of couscous to catch all of the delicious mushroomness!

February 6, 2010

Brownie Taste Test

This week both cooks needed plenty of chocolate and by wonderful coincidence this amazing brownie recipe was posted on smittenkichen.com! We both tried it out and loved it...here are the results:
Cook 1
Having a perfect brownie recipe is a bit like being in love - your belief in the beloved is so strong that you are blind to all others who flit by. When you have The Recipe, you have no inclination to try any others, even if they are touted as 'the best'! And to taste a bite of those sad specimens on black plastic trays that grace every office luncheon would be a waste of calories on what you know to be an inferior version of your recipe; a brown hockey puck sodden with the salty juices of the neighboring turkey sandwich. For a while your recipe is the only one worth baking - it's trust-worthy and well received when it accompanies you to all your dinner parties, dressed in the same crumpled tin foil coat time after time after time...And so you stray.

 And friends, I strayed. I cheated on my perfect brownie recipe for the one I'm about to share with you. I feel so cheap! Was it worth it, you ask? No. My stand-by recipe is still better and it will keep its spot as my #1. But this recipe has plenty of virtues.
It was incredibly easy and quick to make, mimicking the same steps as a box mix, but with a more intense cocoa flavor and a texture so gooey that it must be eaten straight from the pan as you'll be too frustrated to cut squares out of it. So give it a try this Valentine's Day and don't say I didn't warn you about affairs of the heart, eh, stomach.


Cook 2
The last time I made brownies from scratch I ended up with a dry, dense brick with an oily layer on top, so I was a bit hesitant to try this recipe.  But Deb made it sound so easy and the pictures looked so amazing that I thought I'd give it a shot.  It was actually really easy and didn't take very long at all.  The most time-consuming part was heating the chocolate/sugar/butter mixture...I kept stirring and stirring and it took at least 15 minutes before it was actually hot.  It was really grainy looking at this point but once the eggs and flour were added it got smooth and shiny very quickly (although it was so dense I wasn't really able to stir "vigorously" as suggested).
 My baking time varied greatly from the original recipe as well.  I kept adding time so am not entirely sure how long it took but I would guess 30-35 minutes (at 325).  The end result was amazing: so much fudgier and chewier than any mix brownie I've ever had.  We usually go through a pan of brownies at an alarming speed but these are so rich and dense that 3 days later we still have about a third of them left...but not for long!
Best Cocoa Brownies Adapted from Alice Menderich's Bittersweet via smittenkitchen 10 tablespoons (1 1/4 sticks, 5 ounces or 141 grams) unsalted butter 1 1/4 cups (9 7/8 ounces, 280 grams) sugar 3/4 cup plus 2 tablespoons (2 7/8 ounces, 82 grams) unsweetened cocoa powder (natural or Dutch-process) 1/4 teaspoon salt (or a heaping 1/4 teaspoon flaky salt, as I used) 1/2 teaspoon pure vanilla extract 2 large eggs, cold 1/2 cup (66 grams, 2 3/8 ounces) all-purpose flour 2/3 cup walnut or pecan pieces (optional) Position a rack in the lower third of the oven and preheat the oven to 325°F. Line the bottom and sides of an 8×8-inch square baking pan with parchment paper or foil, leaving an overhang on two opposite sides. Combine the butter, sugar, cocoa, and salt in a medium heatproof bowl and set the bowl in a wide skillet of barely simmering water. Stir from time to time until the butter is melted and the mixture is smooth and hot enough that you want to remove your finger fairly quickly after dipping it in to test. Remove the bowl from the skillet and set aside briefly until the mixture is only warm, not hot. It looks fairly gritty at this point, but don’t fret — it smooths out once the eggs and flour are added.

Stir in the vanilla with a wooden spoon. Add the eggs one at a time, stirring vigorously after each one. When the batter looks thick, shiny, and well blended, add the flour and stir until you cannot see it any longer, then beat vigorously for 40 strokes with the wooden spoon or a rubber spatula. Stir in the nuts, if using. Spread evenly in the lined pan.

Bake until a toothpick plunged into the center emerges slightly moist with batter, 20 to 25 minutes is Medrich’s suggestion but it took me at least 10 minutes longer to get them set. Let cool completely on a rack.

Lift up the ends of the parchment or foil liner, and transfer the brownies to a cutting board. Cut into 16 or 25 squares.

January 30, 2010

Hot Pot

Cook 1
When you think of a stew, what do you picture? A delightful pot of tender meat, rich sauce and exquisite flavor? Or do you think of a gluey, dull, beefy mess that requires endless prep work and then cooks for hours only to end up tasting like not much? Well, I'm raising my hand here for the latter. I have always wanted to love stew, but the truth is - well, I don't. The flavor has always seemed lacking somehow - I love the idea of stew, but not necessarily the realized product. If you're in my camp (and even if you're not), take this recipe for a spin and see if you don't find all the idealized qualities of a stew (steamy, cheery, delicious, easy) and then some.


As my boyfriend and I took our first bites of this fragrant coconut chicken stew, we couldn't help but gaze upon the ceramic pot holding our dinner as if it were the Holy Grail. Tender, bright, unctuous, creamy, toasty and sensual - this stew was re-arranging my brain circuitry and carving new pathways in my taste buds. We fell upon our meal in a trance-like state as we lapped up more and more of the tantalizing broth and covetously licked our plates clean like a couple of cats with bowls of cream. We polished off the chicken, sighing with delight, but also with the slight annoyance that our coconut high was coming to an end; and we swore that this would be our last meal on Earth if ever we could choose.
The magic of this recipe is that with a minimum of effort you infuse the chicken with a ton of complementary flavors. The coconut milk creates a spa like environment that yields a seriously moist piece of poultry. This chicken is all about the meat and not at all about the skin, so don't get sulky that it's not crispy - just push it to the side and mov
e on. This can be a light or a heavy meal, depending on how you accessorize it. To eliminate some calories, use light coconut milk and skip the potatoes; instead throw some spinach into the pot to wilt at the last minute or serve the chicken over a bed of thinly sliced red cabbage. To make this a heavier meal, add vermicelli or Chinese noodles into the pot to cook in the broth - they will soak up all that delicious flavor and round out the meal. If you don't have lemongrass on hand you can skip it, but I do recommend sticking with as much garlic as you can tolerate since it imparts a muted but seductive element to the broth. You can also use canola oil in place of the sesame oil without any major repercussions in flavor.

Chicken in Coconut Milk (adapted from Apartment T
herapy's recipe)
serves 2 extremely greedy people and 4 less greedy people

One 3-3.5 pound whole chicken sea salt and freshly ground black pepper
4 ounces (1/2 stick) unsalted butter
2 tablespoons sesame oil
1 pound fingerling potatoes
2 cans (13 - 15oz) regular or light coconut milk
1 cup fresh cilantro leaves

10 whole garlic cloves, peeled and smashed
Zest of 2 lemons
2 tablespoons chopped lemon grass stems
1 tablespoon grated fresh ginger
1 cinnamon stick

1. Preheat oven to 375°F. Season the chicken with salt and pepper at a rate of about 1 tablespoon salt per pound and 1 tablespoon pepper per three pounds
.
2. Heat the butter and sesame oil in a pot that will fit the chicken snugly, like a Dutch oven, and set the chicken in the hot oil. Cook, turning the chicken to get an even golden color on all sides, about 5 minutes total. Remove from the heat, put the chicken on a plate, and dispose of the fat left in the pot.
3. Return the chicken to the pot with the rest of the ingredients, and cook in the preheated oven, basting with the cooking juices every 20 minutes, for 1 - 1.5 hours. It is done when the meat pulls away from the bone without much effort and the potatoes are tender when pricked with the end of a paring knife. Check the temperature of the mea
t until it reaches 175 degrees and then pull it out of the oven.
4. To serve, pull the meat off the bones and divide with potatoes between plates or serve on a platter. Spoon over a hefty helping of the milky sauce. Mind the cinnamon stick.


...................................................................................................................................

Cook 2
: Goulash

Between the holidays and starting a new job this post has been a long time coming...but trust me it was worth the wait! It was really cold in Philly this January, and this meal is the perfect way to fight the cold...hot, hearty, and with a little kick to warm you up. My boyfriend has been making goulash ever since his trip to Hungary last year, and he gets full credit for this post. The best part about it is that there's no real need to measure, chop precisely, or even use a timer! As he says its really the technique that's important, and the rest is simple. The technique he's referring to is the same for most stews: first sear the meat on all sides to get a good caramelized crust (this is where most of the flavor will come from), then remove meat, throw in the veggies for a bit, put the meat back in and liquid (if needed--you don't for goulash) and cook at a simmer for a few hours. The essential tool here is the dutch oven. We just got a nice red one--unfortunately not Le Crueset but it works just as well.


There are a lot of variations of goulash, and according to my boyfriend if you can get your hands on some traditional smoky Hungarian sausage called csabai it is an amazing addition. We also attempted to make csipetke, a lentil-shaped spaetzle, but it was a time consuming process that was not worth the effort. Pasta (egg noodles or orzo) or rice are just as good.

 Goulash

2-3lb meat (beef chuck, pork butt or lamb shoulder)
3 large onions
5-6 large bell peppers
2 large cans whole tomatoes, seeded and drained (keep juice)
3 cloves garlic
2 bay leaves
a lot of paprika (maybe 1/4 c)
3 tbsp thyme
1 tbsp caraway seeds
1 tsp cayenne pepper
wine vinegar

1. Cut meat into large cubes and brown in a little oil in the dutch oven over medium heat. Remove and set aside.
2. Slice peppers (we used green but a mixture of red and green gives a great visual) and throw in dutch oven (no extra oil or fat needed).
3. While peppers are cooking slice onions, then add to peppers.
4. Cook peppers and onions until softened, stirring regularly.
5. Add all the spices (except the caraway seed) and the garlic. Cook for a couple of minutes.
6. Add tomatoes. Cook for a couple of minutes until they start to break up, stirring regularly.
7. Add the meat, caraway seeds, juice from the drained tomatoes and vinegar.
8. Heat oven to 250 degrees, cover dutch oven and put in oven. The goulash should be kept at a simmer until the meat is tender (probably around 3 hours). The temperature required to keep it at a simmer will vary (probably between 220 and 300) so check it regularly until you know. Stir occasionally.
9. Serve over pasta (I like egg noodles or orzo) or rice with sour cream.  And an extra dash or two of paprika on top!
10. Enjoyed curled up on your couch!

December 18, 2009

Christmas Sweets

Cook 1

Cook 2 tackles some classic childhood recipes but for my post I thought I'd offer my experiences with finding some brand new Christmas cookie recipes to add to my repetoire.
As many Christmas seasons back as I can remember, my mom, a Jewish woman who married a Catholic, has baked a dizzying variety of totally delicious Christmas cookies. After a long day at work, she would rush home with bags of nuts, sugar and coconut, and set to work. On certain Saturday mornings in December, I would wake to the sound of frustrated muttering and the dull thud of metal on the countertop, and I would instantly know that my mom was making spritz cookies - and I would hide upstairs for awhile (sorry mom). This year I made my own spritz cookies and shared in her yearly annoyance with the hard-to-handle dough and the fickle spritz gun. I won't share the recipe here because I have not yet perfected a reliable technique for these delicious but finicky cookies.

This year I wanted to make my own cookies but did not know where to start. Generally speaking, I am a traditionalist when it comes to Christmas cookies, with a wish for spice, powdered sugar, and pretty design. The recipes that I will share with you below satisfied my desire for easy technique, delicious taste and authentic Christmas feeling - and I can call them my own and leave the fussy spritz cookies to my mother. Thanks Mom.

Dorie Greenspan's Chocolate Sparkler Cookies


These tender little cookies crumble almost to the touch, with a sandy texture, subtle chocolate flavor, and restrained amount of sugar. They are perfect gobbled up after lunch, dinner or as a snack. In my opinion, these are best with a cup of coffee at breakfast while imagining oneself as a visitor to an Ottoman court, tasting the exotic flavors of cinnamon and cocoa for the first time. Store separately from other cookies to keep the nuanced flavor and tender texture intact.

Adapted by SeriousEats from Desserts by Pierre Hermé by Pierre Hermé and Dorie Greenspan
- makes about 30 cookies

Ingredients
2 3/4 cups all-purpose flour
1/3 cup unsweetened Dutch cocoa powder
Pinch of cinnamon
Pinch of salt
2 1/2 sticks (10 ounces) unsalted butter, at room temperature
1/2 cup plus 2 tablespoons sugar
1/4 teaspoon pure vanilla extract
1 large egg yolk
Sugar, for coating

Procedure:


1. Sift the flour, cocoa powder, cinnamon and salt together. Place the butter in a mixer fitted with the paddle attachment and beat on medium speed to soften. Gradually add the sugar and vanilla and continue to beat, scraping down the sides of the bowl as needed, until the mixture is smooth and creamy, but not airy. Reduce the mixer speed to STIR and add the flour mixture, mixing only until the ingredients are just mixed. Absolutely do not overmix. As soon as the last of the flour is no longer visible, divide the dough in half, shape each half into a ball, wrap the balls in plastic wrap and chill for 30 minutes.

2. Working on a smooth surface, form each piece of dough into a log that's about 1 1/2 inches thick and 7 1/2 inches long. To get a solid log, one without the commonly found hole in the center, use the heel of your hand to gently flatten the dough, then flatten the dough lightly each time you fold it over on itself to make the log. Assured that the log is solid, you can roll it gently under your palms to smooth it out. Wrap the logs in plastic and chill for 1 to 2 hours. (The dough can be made to this point, wrapped airtight, and stored in the freezer for up to 2 months.)

3. Position the racks to divide the oven into thirds and preheat the oven to 350°F. Line two baking sheets with parchment paper and set them aside. In a small bowl, whisk the egg yolk until it is smooth and liquid enough to use as a glaze. Spread some of the sugar out on a piece of wax paper.

4. Remove the logs of dough from the refrigerator, unwrap them and brush them very lightly with a small amount of the egg yolk. Roll the logs in the sugar, pressing the sugar gently to get it to stick, if necessary, then, using a sharp slender knife, slice each log into cookies 1/2-inch thick. I threw out the very ends for fear of burning them because my logs were uneven and the ends were much smaller than the rest of the log. Arrange the cookies on the baking sheets, leaving about an inch of space between each cookie, and bake for 15 to 18 minutes, rotating the pans front to back and top to bottom at the midway mark, until the cookies are just firm to the touch. Transfer the cookies to racks to cool to room temperature.

Keeping: The unbaked logs of dough can be frozen for up to 2 months, but once they're rolled in the sugar, they're unsuitable for freezing because the sugar will melt. Once the cookies are baked, they can be kept in an airtight tin at room temperature for 3 to 5 days.


Vanilla Kipferl

First of all, sorry for the crappy photography, the cookies are not tinted yellow - it's just my poor camera skillz. Similar to Russian Tea Cakes or Mexican Wedding Cookies, these vanilla kipferl have a dough composed of ground nuts, sugar and lots of butter. No egg (which means you can eat the dough raw without any guilt other than that of excessive caloric consumption). What sets this apart from other recipes is the luxurious coating of vanilla sugar after the cookies have come out of the oven. Fragranced with the sultry perfume of vanilla bean, these crescent shaped butter cookies melt on the tongue and are seductive in smell, shape, taste and texture. The hardest part of the recipe is the self-restraint needed to avoid eating all the buttery dough.

makes 57 cookies -Adapted from The King Arthur Flour Cookie Companion.
Ingredients
For the dough:
7/8 cup (1 3/4 sticks, 7 ounces) unsalted butter
1/2 teaspoon salt
7 tablespoons (3 ounces) granulated sugar
1 teaspoon vanilla extract
1 3/4 cups (7 1/4 ounces) unbleached all-purpose flour
Scant 2 1/3 cups (7 1/2 ounces) almond flour (ground almonds), preferably toasted
For the vanilla sugar
1/4 cup (1 3/4 ounces) superfine or castor sugar
1/2 to 1 vanilla bean

Procedure
1. In a medium-sized bowl, beat together the butter, salt, sugar, and vanilla until smooth. Add the flour and almond flour, stirring to make a cohesive dough. Wrap the dough in plastic wrap and refrigerate at for at least 1 hour, or overnight.
2. Preheat the oven to 350°F. Lightly grease (or line with parchment) two baking sheets.
3. Break off walnut-sized pieces of the dough, and roll them into short (about 2-inch) logs. Shape the logs into crescents, then gently press to flatten them slightly. Place the cookies on the prepared sheets.
4. Bake the cookies for 8 to 10 minutes, until they're a light golden brown. Remove them from the oven and let cool on the pan for 10 minutes.5. While the cookies are cooling, process the sugar and vanilla bean in a food processor or blender until the bean is thoroughly ground. Place the vanilla sugar in a shallow bowl. While the cookies are still warm, gently roll them in the vanilla sugar. Transfer them to a rack to cool completely.
Pre-baked cookies - not so pretty before their bath in vanilla sugar. But then doesn't everyone look better after being covered in sparkles and annointed with perfume?

Happy Holidays from A Tale of Two Kitchens!
_________________________________________

Cook 2
As Christmas grows near we want to share some of our favorite recipes to satisfy your holiday sweet tooth. We actually got together to make cookies 2 weeks ago, but were having so much fun catching up that we forgot to take pictures!

This year I made sugar cookies, chocolate covered pretzels, almond tuiles and chocolate balls. The pretzels are my go-to treat for holiday gifts (especially good for bringing to work--fast, cheap, yummy, and pretty enough, especially with the addition of some red and green sprinkles). My first attempt at tuiles was not very successful: the dough wasn't thin enough and was too sweet. But they were still delicious broken up over chocolate ice cream! I'll keep working and when I find a good recipe I'll post it.

My favorite family tradition (apart from decorating the Christmas tree while listening to Dr. Demento's Christmas album) is frosting cookies while watching Its a Wonderful Life or A Christmas Story. This year I took a more unique approach and watched that old Christmas classic, Twin Peaks...maybe that's why all of my cookies look a bit wacky!

My Family's Traditional Christmas Cookies
(Thanks for the recipe Mom...and for making them all these years and putting up with the overuse of sprinkles and undercooked cookies!)

3/4 cup Crisco shortening (I used butter instead)
1 cup sugar
2 eggs
1 tsp vanilla extract
2 1/4 cup flour
1 tsp baking powder
1 tsp salt

Mix shortening, sugar, eggs and vanilla thoroughly. Combine flour, baking powder and salt. Add dry ingredients to shortening mixture. Chill at least 1 hour (I recommend over night).

Heat oven to 400 degrees. Roll dough 1/8 inch thick on lightly floured surface (don't worry about getting it too thin...it's easier to get the cookies off if they are thicker and I think they taste better). Cut with your favorite cookie cutters, holiday themed or not (the bunnies are my favorite). Bake 6-8 minutes or until cookies are a delicate golden color. Makes about 4 dozen.

Quick Cream Icing
Blend 1 1/2 cups confectioners' sugar, 1/4 tsp vanilla, and enough cream, milk or half-and-half (2-3 tbsp) to make a thin icing that sets up after several minutes. Be sure to leave it slightly thicker if you're going to use food coloring.

New (to me) Chocolate Balls
(Thanks to Ed's mom for her mother's recipe...these were a great help in getting us through exam season!)

2 sticks margarine (I used butter)
1/2 lb graham cracker crumbs
1 tsp vanilla
2 cups Angel Flake coconut
1/2 cup crunchy peanut butter
1 lb powdered sugar
1 large bag chocolate chips
1/2 bar paraffin (optional)

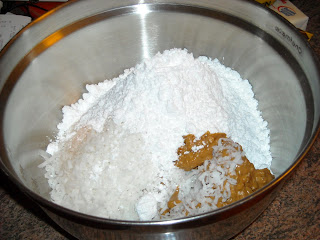
Dump everything except the chocolate chips into a bowl and mix thoroughly. Shape into balls. (Be sure to leave enough in the bowl for stressed-out boyfriend to clean). I recommend chilling them in the freezer for an hour. Melt chocolate chips and paraffin (the paraffin isn't necessary but will make the chocolate coating prettier...I skipped it this year) in a double boiler. Drop balls in chocolate and roll until covered. Place on wax paper to cool. Makes about 4 dozen.


HAPPY HOLIDAYS!!!

December 2, 2009

Food of the Pilgrim's Pride

Cook 1


For me, Thanksgiving is all about pride. It's important to take a moment to recognize that we have all earned this day off - this day to relax and feast and drink and forget about work. I'm glad to have a day to take pride in my family, in my freedom as an American and in the delicious food that I helped prepare. Mostly, I'm proud that we are all still here, celebrating our perseverance, so many days after the Pilgrims celebrated the first Thanksgiving. Despite the wars, the economy, and the nagging fear that yes, humans really are that terrible, Americans are still taking a day at the end of November to cook some turkey and eat together.

But all seriousness aside, I am mighty proud of the food that my family and I put together this year. The turkey was brined and boy was it juicy. I used to hate turkey - or maybe I just hated the idea of a bland, brittle and dessicated piece of meat - but this year I changed my mind. Our bird was glossy and bold, as you can see in the picture above, and quite flavorful. My parents get all the credit for the turkey (my mom as chef de cuisine and my dad as the sous chef).
I'm now going to take you through a few highlights of our meal.

First up is a dish with which I have a love/hate relationship. These so-called 'Best Brussels Sprouts' take forever to make because of the intensive prep required (must finely dice carrots and bacon, quarter and core the sprouts, toast the pine nuts, etc.). Yet. YET. These are the finest sprouts in the land and I make them every year. Just fry up in a big skillet, 6 slices of bacon cut into 1/2 inch pieces, then throw in the sprouts and minced teaspoon of garlic, the cup of carrots and the half cup of pine nuts and coat with the bacon grease. Let cook with the lid on for 5 or so minutes, until the sprouts are wilted but still green, shaking the pan every so often. Add parsley and voila!
And then there were the sweet potatoes with toasted marshmallows. And uh, I do mean sweet. But if you can't eat dessert during dinner at Thanksgiving, then when can you? I also love how unabashedly American this dish is. It screams, 'I'm here...I'm a formerly healthy vegetable covered in marshmallows...get used to it!'
The next dish is a new-comer to our table this year, but came highly recommended by a friend. Parker House Rolls, which originate from the historic Parker House Hotel in Boston, were easy to make and drew rave reviews. They were plenty buttery, but not overly dense like a brioche, nor overly light like a biscuit. The crumb was yeasty enough to absorb a good amount of gravy and best yet, the rolls were divine spread with some strawberry jam the next morning. I used the Gourmet recipe, found here.

We also had creamed spinach, homemade cranberry sauce, mashed potatoes, cornbread and challah stuffing, gravy, mashed turnips and celeriac, and creamed onions and peas. For dessert there was chocolate cake, pumpkin pie, apple pie and pecan pie. I used the Cook's Illustrated vodka crust this year and I will never try another pie crust recipe again. Here's the link to this very trust-worthy recipe.
And with that, I'll turn the cursor over to Cook 2, who will give us a taste of her family's Thanksgiving.

..............................................................................................................................

Cook 2

For me, Thanksgiving is all about family. Don't get me wrong--I love the food but with my sweet tooth I prefer Christmas cookies slathered with icing to the savory traditions of Thanksgiving. So I decided to make my post more of a collection of pictures without any recipes this time.

The big Thanksgiving lover in my family is my brother, David (you'll see his plate later). Last year I hosted my family in New York and when I suggested a non-traditional menu of roasted chicken and updated sides David wouldn't hear of it. So I measured my mini New York oven, my mom bought the smallest turkey she could find, and we had a delicious traditional feast. This year we were all in North Carolina (me, David, his (Canadian) girlfriend Kelley, our cousin Ben, and of course my parents) so my mom whipped up an impressive meal without even breaking a sweat. Remembering the chaos of preparing Thanksgiving dinner last year (even with my mom's help) I can't believe she's able to make it look so effortless!

This year I was very lucky and got to enjoy 2 Thanksgiving dinners, about 6 hours apart! First I ate with my family around 2, and then I joined my boyfriend's family and his sister's in-laws for dinner around 6. Needless to say I was stuffed and very glad I'd run a 5k that morning! Unfortunately I forgot to take my camera for the 2nd dinner, but it was absolutely beautiful (especially the southern coup de grace--orange jello cool whip salad! It kindof looks like this and tastes amazing). Enjoy the photo montage!

My dad, Ben and Kelley enjoying a lively game of Kings in the Corner waiting for dinner.

My mom carving the delicious turkey.

Infinite mini pumpkin muffins

David's 1st plate!

The menagerie: Charlie the cat, Bandit the shiba inu (with his back to the camera as usual) and Arne the terrier mix.

November 8, 2009

Soufflés Galore

Cook 1: My Soufflated Ambitions

I've always wondered why cheese souffle wasn't more popular. It seems like a dish that has a rustic coziness despite its French ethnicity, that would appeal to home cooks and hipster chefs alike. So this weekend when I set out to make this casserole of puffed egg and cheese, I counted on re-discovering a hidden gem. I would trumpet the re-capture of this lost treasure from the rooftops and the dish would be launched into a glorious renaissance.
But first I watched Julia Child's video on making cheese souffle, found here. It seemed really easy. I used her recipe and all her suggestions.

Because I was serving cheese gougeres (hot cheese puffs) before dinner, I needed the oven and left the vulnerable unbaked souffle, covered by a large pot(as approved by Julia Child), out on my kitchen counter while I tended to the gougeres. Reader, remember this.

(By the way, gougeres make a splendid hors d'ouevre. They have an air of fanciness to them, but they're downright easy to prepare. Serve them hot and with a glass of champagne or white wine.)

So back to the souffle. I popped it in the oven and dutifully waited by the door until the obligatory 25 minutes had passed. I also downed a couple of glasses of wine to ease my nerves and entertain my guests. Through the oven window I could see the souffle start puffing up, true to its name (souffler means 'to puff up' in French).
When the top was browned and airy, I pulled it out of the oven and it thanked me by immediately collapsing down like a cheap feather pillow. My worst fears were realized! Luckily my guests were too polite to say anything.


While the subtly spicy flavor and tender texture was very good, I missed the volume and pizazz that should accompany a properly puffed souffle. A souffle should sashay and bounce. Mine limped.
So what happened? Should I not have left it out on the counter? Maybe the dish was too large and the batter couldn't rise properly? I used an 8 cup capacity dish, but made a recipe that called for 6 cups. Maybe I didn't beat the eggs whites properly. I was afraid of over-beating so maybe they didn't achieve enough volume to begin with.
Will the souffle rise to glittering stardom as I had predicted? Probably not. There may be a reason why the cheese souffle was lost in the recipe books. It's kind of a pain in the ass to make (lots of steps, results are not guaranteed), it has to be timed precisely, and it's not a filling meal for the the amount of time invested in its production. I think my guests were still hungry, despite a large side salad of frisee, butter lettuce, toasted pecans, pear and lemon vinaigrette. I served brownies for dessert with some ice cream. All in all, a good dish, but not one I will make again soon.

Souffle au Fromage
Mastering the Art of French Cooking, Julia Child

For 4 people

Preheat oven to 400 degrees and butter and coat in cheese the souffle dish:
6 cup souffle mold
1 tsp butter
1 T grated swiss or parmesan cheese

Souffle Base:
3 T butter
2 1/2 quart saucepan
3 T flour
wooden spatula or spoon
1 cup boiling milk
wire whisk
1/2 tsp salt
1/8 tsp pepper
pinch cayenne pepper
pinch nutmeg
4 egg yolks

Melt the butter in the saucepan. Stir in the flour with wooden spoon and cook over medium heat until butter and flour foam together, a total of 2 minutes. Don't brown the mixture. Remove from heat and when mixture has stopped bubbling, pour in all the boiling milk at once. Beat vigorously with a wire whip until blended. Beat in the seasonings. Return over moderately high heat and boil, stirring with the whisk, for 1 minute. Remove from heat and immediately beat in the eggs yolks, one at a time, beating furiously to combine. You can prepare the base to this point ahead of time. Dot the top with melted butter and set aside until you want to use it.

Egg Whites and Cheese:
5 egg whites (room temperature)
pinch salt
1/4 tsp cream of tartar
3 ounces coarsely grated swiss or parmesan cheese

Beat egg whites in an unlined copper bowl or in an impeccably clean and dry aluminum/ceramic bowl. I used my stand mixer. Add the cream of tartar and salt and beat until stiff peaks form. You will know because the egg whites will just be able to stand up on their own when you lift the whisk from the bowl. Don't over-beat or the souffle will be dry. Stir a big spoonful of egg whites into the prepared base and all but a tablespoon of the cheese. Delicately fold in the rest of the egg whites. If you don't know how to fold in egg whites, check out this video.

Baking:
Turn the souffle mixture into the prepared mold, which should be almost three quarters full (mine wasn't, probably a fatal error). Tap the bottom of the mold lightly on the table and smooth the surface of the souffle with the flat of a knife. Sprinkle the remaining cheese on top. Set on a rack in middle of preheated oven and immediately turn heat down to 375. Do not open door for 20 minutes. In 25-30 minutes the souffle will have puffed about 2 inches over the rim of the mold, and the top will be nicely browned. Bake 4-5 minutes more to firm it up and serve at once.

..................................................................................................................................

Cook 2: Roasted Garlic Souffle


I was really excited about this project--I've never made souffle before and I was definitely a bit intimidated. At my boyfriend's suggestion I watched the Good Eats souffle episode (available on youtube) and it was incredibly helpful! In the episode Alton makes a basic cheese souffle, so I just followed most of his instructions but used roasted garlic for the flavoring instead of cheese. I was really worried that something would go wrong and it wouldn't rise but after about 15 minutes in the oven I could see little peaks sticking up over the edge and knew that it was working! This turned out to be much simpler than I ever expected, and definitely a dish that will be added to my repertoire.

Roasted Garlic Souffle
Adapted from Alton Brown's Cheese Souffle

Ingredients:
1 tbsp ground parmesan
1 head garlic, roasted and chopped in the food processor
3 tbsp butter
3 tbsp flour
pinch of salt
1 1/2 c milk, heated
4 egg yolks
5 egg whites
1 tbsp water
1/8 tsp cream of tartar

1. Before you start anything set the oven to 375. The oven needs to preheat and then stay on for another 15-20 minutes to heat up the walls so that all of the hot air doesn't escape when you open the door to put the souffle in.
2. Butter your souffle dish and coat with ground (I just used the smallest grate possible) parmesan. Put dish in freezer.
3. Make a roux: melt butter over medium heat, then add flour and salt and whisk for 2 minutes over low heat.
4. Stir in heated milk and bring to a boil.
5. Whisk egg yolks until light yellow and creamy. Turn off heat and temper egg yolks with milk mixture (bechemel) by adding a small amount of bechemel at a time and whisking well to combine. Add a tbsp at a time 3 or 4 times and then dump the eggs into the bechemel and combine well. Set aside to cool (this needs to come to room temperature before being combined with the egg whites).
6. Beat egg whites, water and cream of tartar to stiff peaks.
7. Stir 1/4 of egg whites into yolk mixture. Then fold in the rest a third at a time, being as gentle as possible. It's ok if there are some white streaks.
8. Pour into souffle dish. Smooth the top and run your thumb around the edge to help the souffle rise straight.
9. Cook for 35 minutes without opening the oven door. As tempting as it may be, do not open the door until the timer has gone off or the souffle will fall. I just left the light on and stared at it the whole time. Test with a knife to make sure its ready (firm at the top but still somewhat gooey at the bottom).
10. Attempt to serve as best you can (we ended up with globs of souffle but it still tasted delicious) and enjoy!

I served this with oven roasted asparagus (roasted in the toaster oven).